Showing posts with label Cooking. Show all posts

Saturday, February 18, 2012

Clothing Swap Party

I recently had my Second Annual Clothing Swap. Food was made and eaten, closets were cleaned, clothing was swapped, and a good time was had by all! I guess I should start by explaining the concept behind the party. It started last spring when I was needing to get rid of a lot of clothes. Some was simply not quite the style anymore, and I had no qualms about sending that stuff to Goodwill, I just had to get around to it. (And you know, those round tuits are often very hard to come by.) I also had a lot of clothes that had gotten too big, but that I still really liked. Those would be harder to get rid of. I had some friends I thought might enjoy some of those items, and I felt it would be easier to let go of them if I knew they were going to a good home.

Then, while surfing the web, I found the idea of a clothing swap. Some people get really crazy about it, assigning point values to items based on how desirable they are, or declaring that you will leave the party with the same number of items as you brought, like it or not. I'm way simpler than that. I invited a bunch of girls (wide range of sizes, wide range of styles, but all within ten years of my age) to come and bring whatever clothes and accessories they didn't want taking up space in their closets any more. We'd all go through all the stuff, and whatever didn't get taken was getting loaded up in a car and going straight to Goodwill. If there were things that multiple people wanted, we'd have a little fashion show and see who it looked best on!

As I said, this was the second year of doing it, and almost all of last year's attendees came, along with some new ones. (One girl even brought her mom!) I put a few boxes on the coffee table to contain some of the smaller items, such as purses, scarfs, belts, and jewelry. Shoes went underneath the table. (We had a separate area in the foyer for people to leave their own purses and shoes!) Two different girls had hanging racks, which they brought, which made a good place for dresses and skirts. The skirts that didn't fit on the racks were just draped over a chair, and we sorted through everything, making stacks of shirts, tank tops, pants, and shorts. After we all sorted our stuff out (and got a preliminary glance at everyone else's goodies), we moved on to the food!

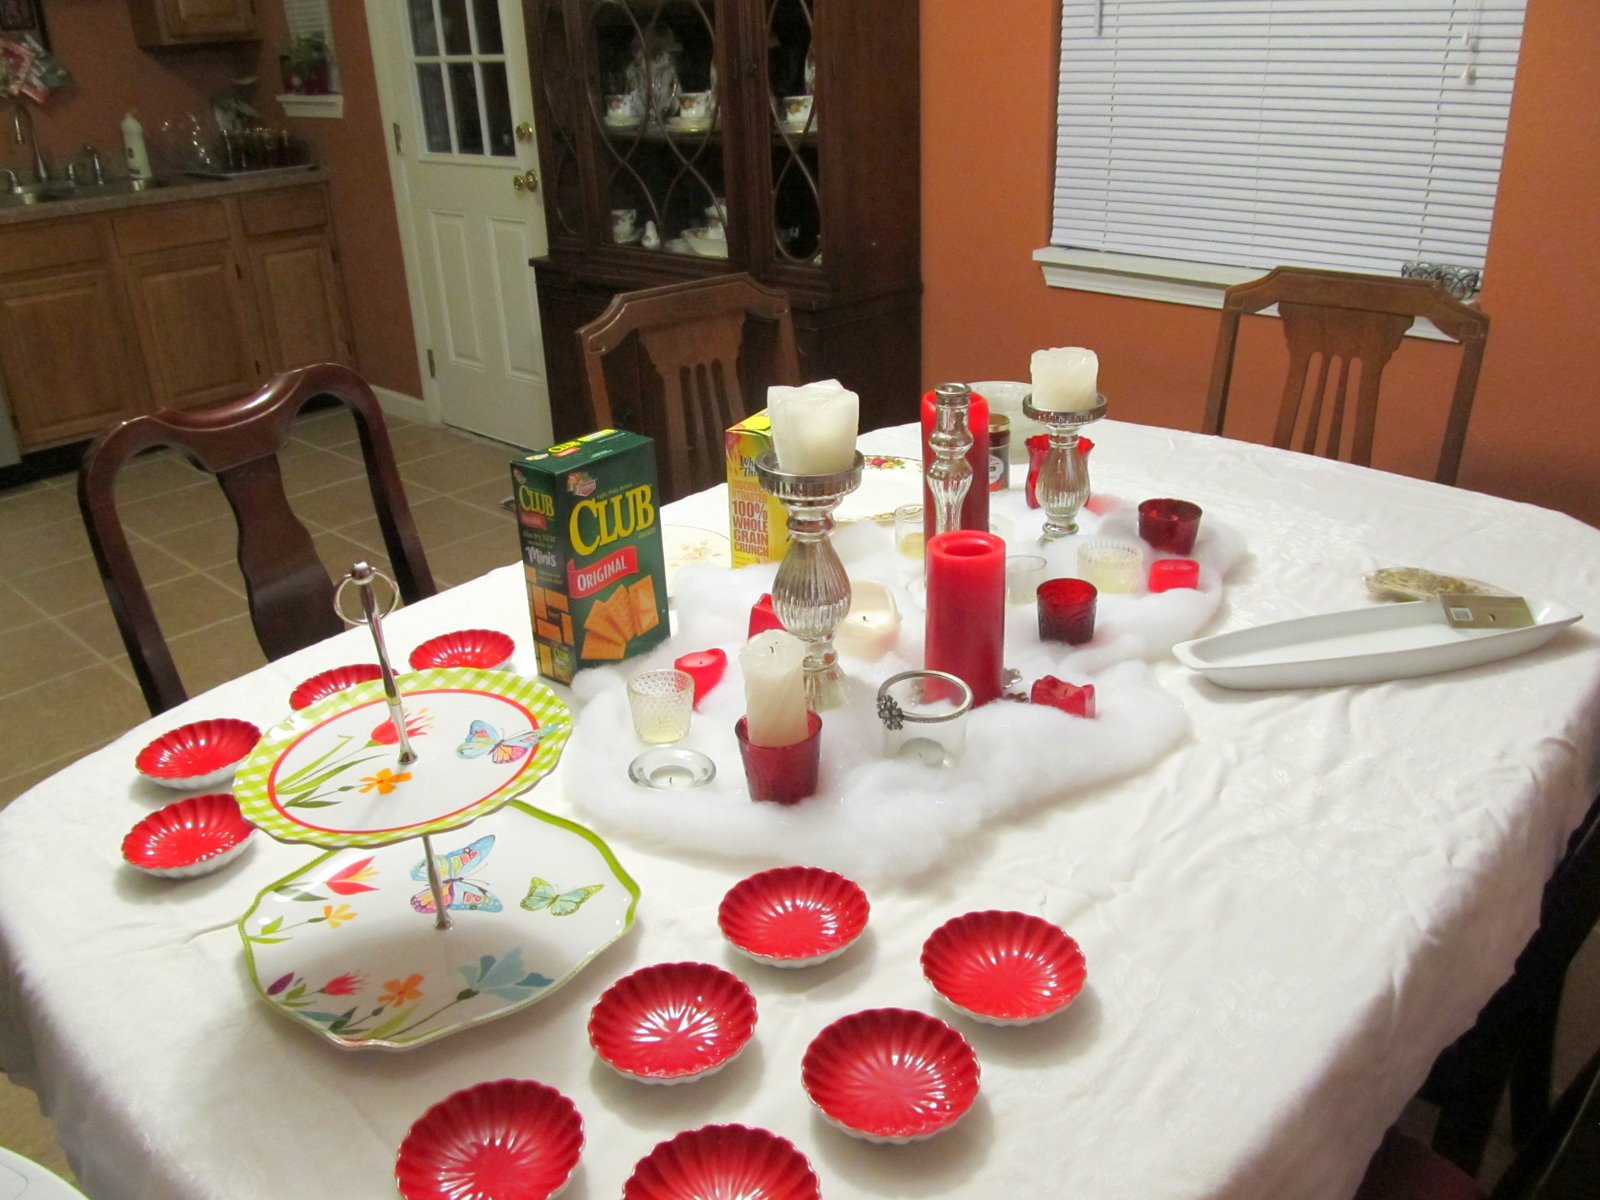
The night before, I had set up the table, so it took less than a half hour of prep that morning to get everything on the table. I put all the serving dishes where they would wind up. (Extra points to anyone who recognizes my candle vignette that was on the coffee table last month. I just moved it to the dining room table so we'd have space on the coffee table, but I wouldn't have to take the time to put all those candles away.) The cracker boxes are sitting next to the plate that will hold the crackers, and the hummus bowl that will fill that empty space is filled and waiting in the fridge. All my refrigerated items are gathered together on the same shelf, my nonrefrigerated items and the tools I'll need to prep the food are together on the counter, and the glasses are all set up on a large tray. (I have discovered that if my glasses and drink pitchers are on a tray, I wind up with a lot fewer damp spots and tea stains on the tablecloth.)

The morning of the swap, I pulled the hummus out of the fridge, put my sliced pita and ciabatta on the tiered server, poured dipping oil in the individual bowls, slathered some jalapeno jelly on some brie cheese, wrapped it in phyllo, and popped it in the oven to warm, and made some little caprese bites I found on the ever-useful Pinterest. My sis-roomie helped with pouring the dipping oil and piling the breads on the serving dish, but even had I been working alone, the prep would have taken under an hour, and everyone loved the food. (At the far end of the table are some drinks, crackers, and dip that some of the attendees brought.)

By the way, the pictures of caprese bites I found on Pinterest were really fancy looking, but I just used chunks of Roma tomatoes, torn sections of basil leaves, and fresh mozzerella "pearls" (fancy way of saying pre-made chunks), and mine were just as pretty in the serving dish as those fancy ones!

After we had some food, we moved on to trying on all sorts of different items of clothing. The great thing about a party like this is that you can try out something that may be a step outside of your usual style without worrying about wasting money! I saw a couple items from last year's swap reappear this year, and no one got any hurt feelings. We all just were thrilled about our newly cleaned closets and our fun few finds!
Posted by Picasa

Sunday, February 12, 2012

Crab Rangoon...Sort Of

So, I was minding my own business, messing around on Pinterest, when I saw a recipe for baked crab rangoon. As it was about supper time, I immediately got hungry for some. The only problem was that I didn't have most of the ingredients! No problem, though! I come from a long and proud tradition of ingredient-substituting in recipes. No crab? Well, imitation "krab" is actually made from fish, and I just happen to have some frozen fish fillets. No cream cheese or ricotta, either. But cottage cheese is sort of like ricotta, right? I added some garlic and onion, and some "Signature Blend" from a recent trip to the Spice and Tea Exchange in Saint Augustine. I threw in an egg, just for good measure, but that made the mixture a bit too sloppy. I think I should have drained the cottage cheese a bit, first.


I mixed everything together in what looked and smelled like reasonable proportions, then spooned small amounts onto my wonton wrappers, then brushed the wrappers with egg, which is supposed to help them brown. I should have sprayed my cookie sheet with oil before starting--some of the wonton wrappers that I initially filled too full (resulting in filling overflow) sort of got glued to the pan. When you're filling the wrappers, if you think you've got about the right amount in your spoon, use a bit less than that, and you'll probably be okay.

While the wontons, or rangoons, or whatever you want to call them, were baking (350 degrees Farenheit, because that's the magical temperature at which everything bakes), I whipped up a little sauce with soy sauce, wasabi, and lemongrass. (My local grocery store stocks lemongrass, ginger, and a few other herbs in squeeze tubes--very handy!)


 Unfortunately, this sauce was a bit too strongly flavored for my wontons, so I had to figure out a way to tone it down. Turns out the magical ingredient was mayonaise, of all things--mixed a bit of my too-strong sauce in with some mayo, and it was all good! This photo is with the first sauce, though--by the time I finished the second version, I just wanted to eat them, not photograph them!
Posted by Picasa

Saturday, November 5, 2011

Late-Night Omelet

This late-night cooking adventure involves eggs, salt, Penzey's Bouquet Garni spice mix, vegan cheese, and almond milk. The dairy-free options are simply because that's what I had, not because I have any experience in using them! It also involves salsa, which I didn't think about using when I was taking this photograph.

I whomped up the eggs a little bit in a bowl, seasoned with salt and bouquet garni, and dumped them in a nonstick skillet. I grated in a bit of cheese.  You may recall my one-and-only previous experiment in cooking with vegan cheese, where my Brazilian cheese bread came out more as oil bread.  The vegan cheese works great in omelets, though!

(On the other hand, after I finished making my omelet, I tried using it to make fried cheese.  With normal cheese, you just grate a line of cheese into the pan and let it cook until it browns.  However, vegan cheese doesn't brown--it just turns into oil and some yucky-looking solids.  I don't recommend trying it.)
At this point, I decided I wanted a bit more flavor in my omelet.  So I poured in a bit of salsa--just let it sprinkle in a few spots.

I covered the skillet with a lid for a few minutes to help the top cook. You could also pop it in a hot oven if you want to have it puff up like a fritata.

Tonight, however, I let it cook until it could slip around in the pan (if it doesn't slide after you loosen the edges, it's not yet ready), then folded it in half and enjoyed my French-Mexican omlette.
Posted by Picasa

Wednesday, November 2, 2011

Strawberry Topping

One of my favorite late-night snacks to make is strawberry topping. I love to have it on ice cream, but today I had no ice cream, only the last few slices of a store-bought angel food cake. Aren't you sorry for me?

This time I made it with frozen strawberries, but it's great with fresh berries or frozen berries of any sort. Step one is to boil the berries. Well, I should clarify that. Tonight, my first step was to dump a couple handsful of strawberries and some sugar into the pot and set it to boiling. In the past, I have occasionally tried caramelizing the sugar first, but it didn't seem to make much difference in the flavor, so I don't usually do that. You can leave the sugar out, if you like--after all, berries tend to be sweet, and you'll probably be using this sauce to top something else sweet. You can also experiment with white sugar, brown sugar, honey, or whatever other sweeteners you like.

I tend to let it go at a pretty strong boil for a while--you want to break down the cells of the berries so they're easier to smash. You also want to get rid of some of the water, so the sauce thickens up. (Remember, it will also thicken some as it cools.) Once the berries begin to break down, I use a fork or a potato masher to squash the berries. I like my sauce pretty lumpy, with large chunks of strawberry, but you may want it smoother, depending on your purposes. I'm sure an immersion blender, regular blender, or food processor would also work well!

When the sauce is almost at the thickness and smoothness you want, you can toast your angelfood cake, if that's what you're using the topping for. It's absolutely not necessary, but it's a nice touch. I often add a bit of vanilla or almond extract to the sauce at this point, but, again, it's not a necessary step.

Spoon the sauce over your cake, ice cream, or whatever else, and enjoy!  (I apologize for the dark color of the sauce in this photo--it was night time and apparently my lighting wasn't quite up to par.)


Posted by Picasa

Tuesday, October 18, 2011

Autumn Fruit Tartlets

It often happens that my most creative cooking is done late at night.  I was wanting something sweet, but was out of ice cream (oh, the horror!).  I remembered I had some raisins and dried dates, and I also had some pear butter a friend had made and given me, so I decided to make up some little tarts. 

I used the raisins, dates, and some walnuts, as well as some vanilla, cinnamon, milk, instant tapioca pudding, and wonton skins.  
I started by soaking the dried fruit and walnuts (which I toasted for a few seconds on a plate in the microwave) in milk.  Why soak them?  Well, the dates were getting a little dry.  I mean, even for dried fruit.  I didn't want hard fruit, I wanted sweet bits of chewy deliciousness.  Why milk?  It was the liquid the instant tapioca called for, and I figured I'd just add the extra soaking liquid to the pudding.

The instructions say to let the tapioca soak five minutes in the milk before you start cooking.  Do it.  I didn't, and I'm fairly certain that's why my pudding never got completely thick. 

After I made the pudding, I mixed in the fruit and nuts, along with some vanilla and cinnamon.  Sorry, I don't have exact amounts--just add and mix until it smells good!  At this point you can either wait for the pudding to thicken as it cools, or you can be impatient like me and just move quick before things run out of the wrapper.  When you're ready to move on to the next step, lay out a few wonton wrappers and a small bowl of water, then heat up some oil in your iron skillet.

Spoon a touch of pear butter (you could probably use apple butter, too) into a wonton wrapper, then a small (you'll need less than you think, especially if it's still runny) spoonful of your fruit-and-nut tapioca.  Dip your "impeccably clean" (as Julia Child used to say) finger into the bowl of water, run it around two adjacent sides of your wonton wrapper, fold it in half, and pop it into the frying pan.  Your filling is already cooked, so you're just trying to brown the outside a little.  When the color looks good to you, pull it out. 

 
It took a few minutes to make them, mainly because "minute" tapioca takes a while to make, what with the soaking and the waiting for things to heat and all, but they were surprisingly good!
 
Posted by Picasa

Saturday, October 15, 2011

This Morning's Breakfast

My sis/roomie and I both slept rather late this morning, and we'll both be having late suppers, so we wanted a rather substantial brunch. Somehow or other, it was decided that I (the less gourmet one of the pair) would make Eggs Benedict. So I looked up this recipe on my trusty allrecipes.com, and set to work.

This pot was inherited from my great-grandmother, and it includes a double boiler (needed to make the hollandaise sauce) and an egg poacher. When have you ever heard of a pot having an egg poaching attachment? That's what the round thing with the three little muffin cups is. We didn't have English muffins, but we decided that croissants are a perfectly good substitute. No Canadian bacon, but smoked ham deli meat works; and no worcestershire sauce, but a splash of soy sauce works just as well...I hope.

We decided to split the recipe in quarters. Not only did we not have a full dozen eggs, but we didn't feel the need to eat two servings each, all by ourselves. After starting the hollandaise sauce, however, I decided that I should only cut the measurements for the sauce in half. That was a good decision--there was a little extra, but not twice too much. Note: before you add the butter, the hollandaise sauce looks and smells kind of yuck. Add the butter as soon as you get the eggs and lemon juice whipped up. Yes, I know that if I were a real foodie I'd have real lemons on hand, but for right now, the "RealLemon" stuff in the little plastic squeezy lemon will have to work.

Isn't this pretty? The hollandaise sauce started to come together and look nice as soon as I started adding the butter. It smelled a lot better, too.

Once you get the hollandaise sauce made, you have to keep it warm while you do everything else. My solution was to pull the double boiler out, clap a lid on it, and put it in the microwave with a hot pad underneath. It helped--the sauce was still warm--but I think it would have worked even better if I'd warmed the lid in some hot water beforehand.

Never start preheating the oven when the recipe tells you to, at least not on your first try. I nearly burned my croissants! By the way, even though you're supposed to butter the English muffins when putting everything together, there is absolutely no need to butter croissants--they're practically made of butter.

I tried two different ways of poaching the eggs, partially because I wanted to experiment and partially because I needed to poach four eggs and my pan and my pot would only hold three each. The first way (which, in the busyness of getting everything done, I forgot to photograph) was by oiling two of the little muffin cups of my poacher and putting them over the water, just like the double boiler. I added the eggs, salted them a bit, and let them cook. The second way, pictured above, was part of the way apparently espoused by the folks over at America's Test Kitchen. Unfortunately, my sis only told me part of the method. I heated water in a pan (not a pot--it's supposed to keep the eggs from floating around so much), salted the water a little, and slipped the eggs in. No white vinegar in the cupboard, so I couldn't add any to the water, but it's supposed to help keep your eggs unified. Unfortunately, I managed to overcook all the eggs. Not rubbery, but definitely solid all the way through. Apparently you're supposed to add the eggs to the boiling water, then turn the water off and just let them sit for a while--I guess until the whites are opaque. Then the yolks should still be nice and runny, perfect for soaking up with your English muffin (or croissant).

Fry up the lunch meat in an iron skillet with a little bit of olive oil...

And put it all on a plate! Definitely worth making again.

Monday, October 10, 2011

The Thrill of Success; the Agony of Defeat

I don't really enjoy everyday cooking, but I'm always up for a challenge, cooking something particularly interesting-sounding. That's how I wound up making six bazillion spanakopita triangles for my family's Christmas Eve get-together last year.

Today's projects weren't quite as crazy--or so I thought. I just wanted to try out a recipe for "Quick Pao de Queijo" that I'd found (Brazilian cheese bread--amazing stuff), and take a go at the "Brazilian Lemonade" that I'd found at the same website. (Lots of really tasty-looking stuff there, by the way). I figured this was the perfect time to try the cheese bread, because I had a gluten-free, dairy-free friend coming to visit, and this stuff uses tapioca flour. I figured I'd just substitute some soy cheese for the real stuff, and we'd be golden!
This is the tapioca flour. The box looks like it's straight out of the 70's!

The recipe called for putting all the ingredients for the batter into a blender and mixing. here you see my food processor and several of the ingredients (I was using part soy and part milk cheese for this first trial batch). You can also see that I'm not exactly the neatest cook around--flour tends to go everywhere. This was where I got the beginnings of an idea that a blender and a food processor may not be completely interchangeable--my batter tried to escape!


Ever the valiant cook, I contained the batter and poured it into muffin tins) it was supposed to make a full dozen, but apparently either my food processor didn't make the batter as fluffy as a blender would have or I just filled them too full). I put water in the last three muffin cups so they wouldn't burn. I popped it in the oven, pulled it out, and was too distressed at the results to remember to take a picture.

Did you know that the first ingredient of soy cheese is oil? Did you know that when you melt soy cheese, you pretty much wind up with straight oil? I'll have to try this again, but with real milk and real cheese, instead of almond milk and soy cheese; and with an actual blender!

Well, on to project number two. Apparently "Brazilian Lemonade" is actually limeade with sweetened condensed milk. I nuked the limes a few seconds each to soften them and make them juicier.


Then I made my sugar syrup and put about half the cut-up limes in the food processor. My mistake was following the directions where they said "put half the limes and half the sugar syrup in the blender," but putting all that in a food processor!


Sugar water everywhere! Let my wet, sticky counter be a lesson to you--food processors and blenders are not interchangeable. Guess what appliance is next on my list of things to get! But when I started over again with less sugar syrup and more limes, I wound up with something like this--much better!

The next step was to strain the mixture through a sieve, so you wouldn't have to strain it through your teeth when drinking it. Guess what other basic piece of kitchen equipment I don't have?

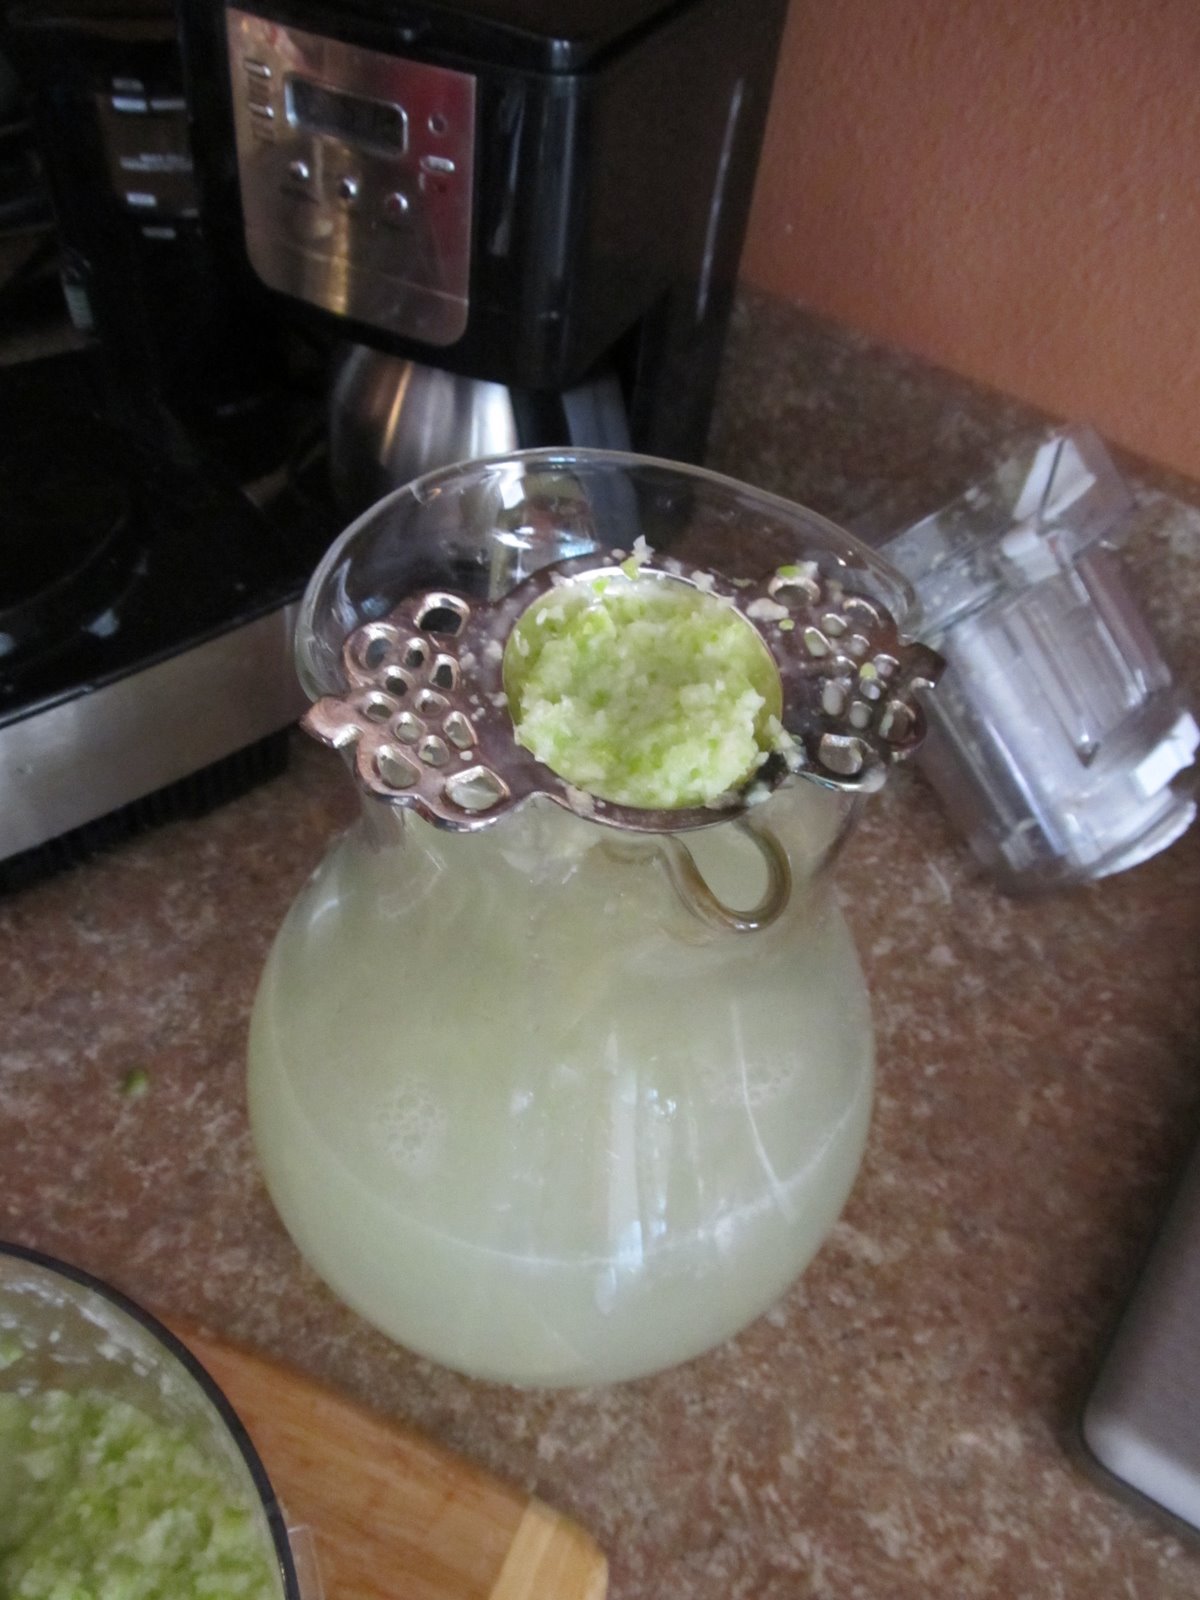
I wound up putting it very slowly through a fancy silver tea strainer. It took forever, but it worked! (Guess what I got at Target that weekend?)

The last step was to add a few tablespoons of sweetened condensed milk. Sounds crazy, but it just makes it amazingly good--like a lime creamsicle! My only piece of advice for the sweetened condensed milk is to buy one of those tinytinytiny cans if you possibly can--my sis/roommate used what was left over for coffee creamer, but there was a LOT, and I had bought a small can!

So there you have it--I'll have to try again on the pao de queijo, but the lemonade was a big hit when I took it to a Dr. Who-watching party that night!

Posted by Picasa